Tuesdays
10am – 4.30pm
Saturdays
9.30am- 4.30pm
Total of 37 weeks of tuition
Deposit = £200
Cost = £975 per term (3 terms per course)
Limited to 12 Students
Portrait Course Tuesday and Saturday
£2,950.00
Description
Struggling to Create Realistic Portraits? Here’s How You Can Master It.
You’ve spent hours trying to capture a likeness, but something always feels off. Maybe the proportions don’t quite match, or the shading flattens instead of bringing your subject to life. You admire the effortless realism of master portrait artists and wonder:
“How do they do it? And why do my portraits look nothing like that?”
If you’ve ever felt frustrated by your progress or unsure how to improve, you’re not alone. The truth is, portrait painting isn’t about talent—it’s about learning the right techniques. And that’s exactly what we teach in the Academy Portrait Painting Course.
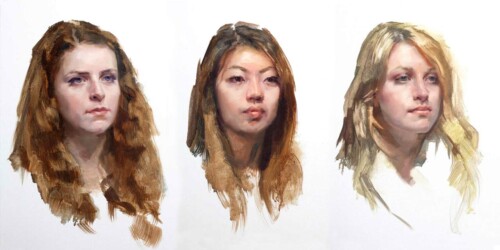
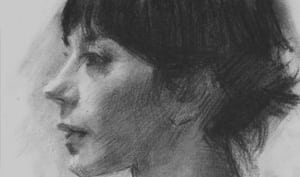
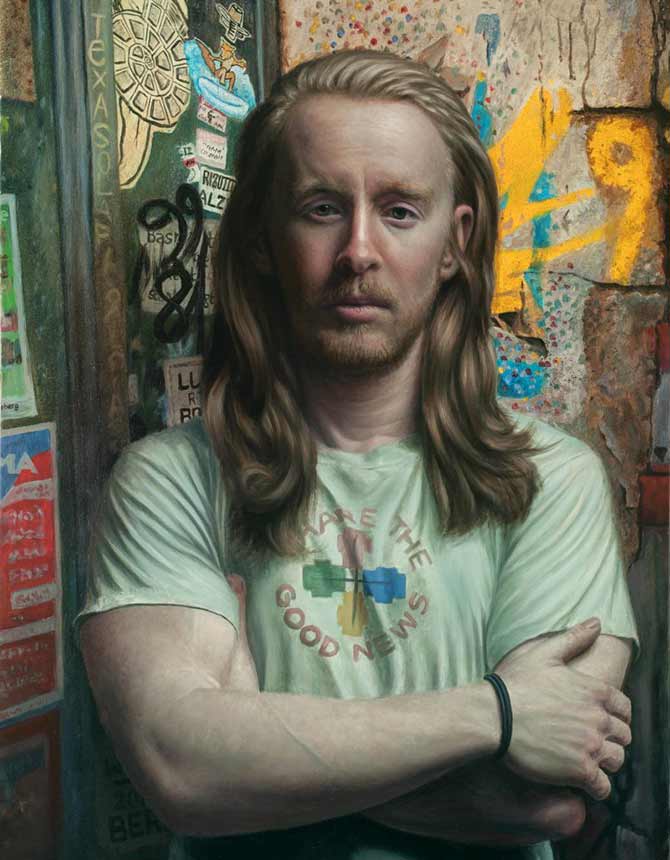
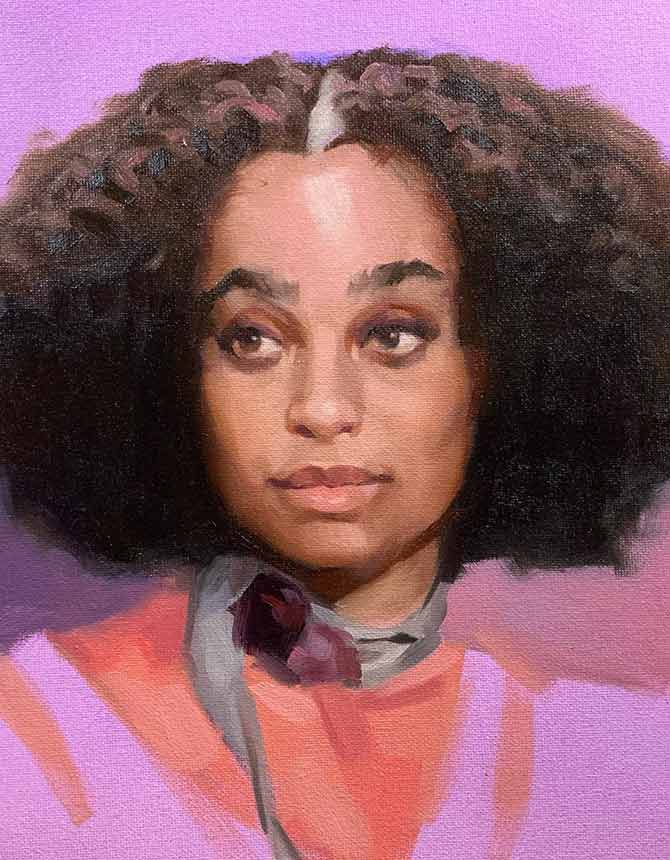
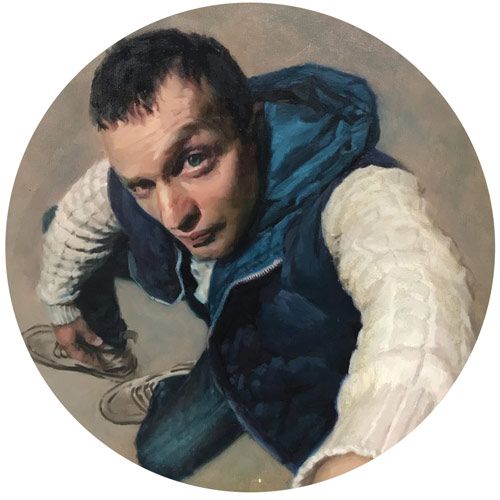
Previous Graduates Recent Work


Step 1: Fixing the Root Problem – Learning to See Like a Master
Many artists struggle because they guess rather than measure. In the first part of the portrait painting course, you’ll develop precision in drawing using classical methods.
- Learn Sight-Size and Comparative Measurement to eliminate guesswork
- Understand the essential role of tone in creating a three-dimensional effect
- Train your eye with the Asaro head model to simplify complex forms
By the end of this stage, you’ll finally understand why past portraits didn’t work—and how to fix them.
Step 2: Adding Colour Without Losing Structure
Ever painted a portrait that looked great in black and white, but turned muddy when adding colour? That’s because many artists jump into colour without first mastering tonal relationships.
- We solve this by building a strong foundation before introducing the Full-Colour Palette.
- Learn the Alla Prima technique used by master painters for a fresh, vibrant finish.
- Study modern masters of colour application and apply their techniques to your own work.
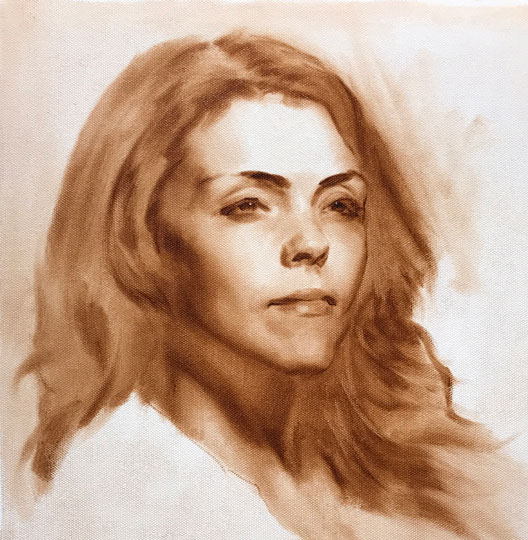
Watch Louis’s Full demonstration portrait of Lisa all episodes HERE
![]()
Step 3: Confidence & Artistic Growth
By the end of this 40-week portrait painting course, you’ll not only be painting realistic, expressive portraits, but you’ll also gain the confidence to work independently—whether in a studio or with live models.
Imagine the moment when you finish a portrait and see the likeness staring back at you. No more frustration, no more struggling—just a clear, proven process that works.
This Course Is for You If…
- You struggle with proportions and want to stop relying on guesswork
- You want to learn a structured, professional approach to portrait painting
- You’ve hit a plateau and need a clear path forward
Ready to finally master portrait painting?

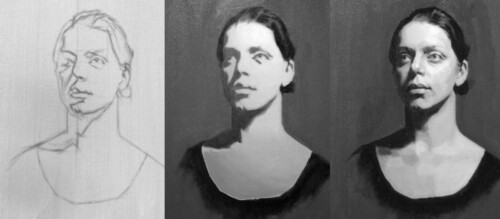
Before & After: Judith Booth’s Transformation
Judith Booth joined the course as a relative beginner. Below is a drawing she did before starting, alongside her final portrait—a testament to her incredible progress.
Through dedication and disciplined practice, she followed the course structure, completed every assignment, and achieved remarkable results. Her transformation speaks for itself.

Testimonials
” I have thoroughly enjoyed my year on the Realist Academy painting course. I realised that I needed expert help to improve my portrait skills and the course really delivered. As a complete beginner I felt comfortable with the well structured approach taught by Louis. Assignments done each week were essential in practicing the skills learned in class. I’m really proud of the portraits I have managed to produce during the course and one of them won first prize in an art exhibition. Something I would never have dreamed of a year ago! I would recommend the course to anyone wishing to improve their portrait skills or learn from scratch.”
Judith Booth
” Joining and completing the Portrait Painting course was one of the best decisions I have made, following Louis’ guidance I was able to improve my painting as well as drawing skills which are essential for delicate portrait work. Lending his vast knowledge and experience has allowed me to get a firm grasp of colour theory as well as being able to analyze my own work critically to make adjustments and improvements.
The limited number of seats and structure of the course allowed Louis to focus on each student and give them ample attention and the studio was packed with technology and innovations which allowed me to learn and understand things at a much faster rate than I would have if I was studying by myself.
Other than that, Louis is a great teacher with a fantastic character and he always goes the extra mile.”
Tom Kielski
About The Course
The Portrait Painting Course is thoughtfully divided into two essential parts: Tone and Colour. The first part of the course covers Tone is divided into, Drawing and Tone.
Drawing
In the second part of the Portrait Painting Course, we’ll dive deep into the theory and practical application of colour. You’ll explore the Full Colour Palette, which is perfectly suited to the Alla Prima style of painting, known for its fresh, vibrant finish.
Studying masterpieces is the fastest way to build a strong visual vocabulary. This term, we’ll be focusing on some of the modern masters of the Alla Prima technique, providing invaluable insights into handling the complexities of a full palette.
By learning from these masters and applying their techniques, you’ll begin to develop your unique style as a portrait artist.
Colour
The next step is tone, we will be learning how to observe and describe 3-dimensional form without the distraction or complexity of colour.
Simplification is key, we start by using the model of the Asaro head as an armature to break down the features of the face into simple geometric planes. Training the eye to accurately compare the tonal relationships of each plane is crucial to painting a convincing portrait.
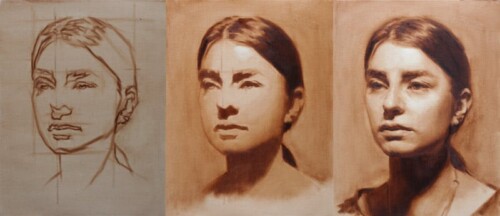
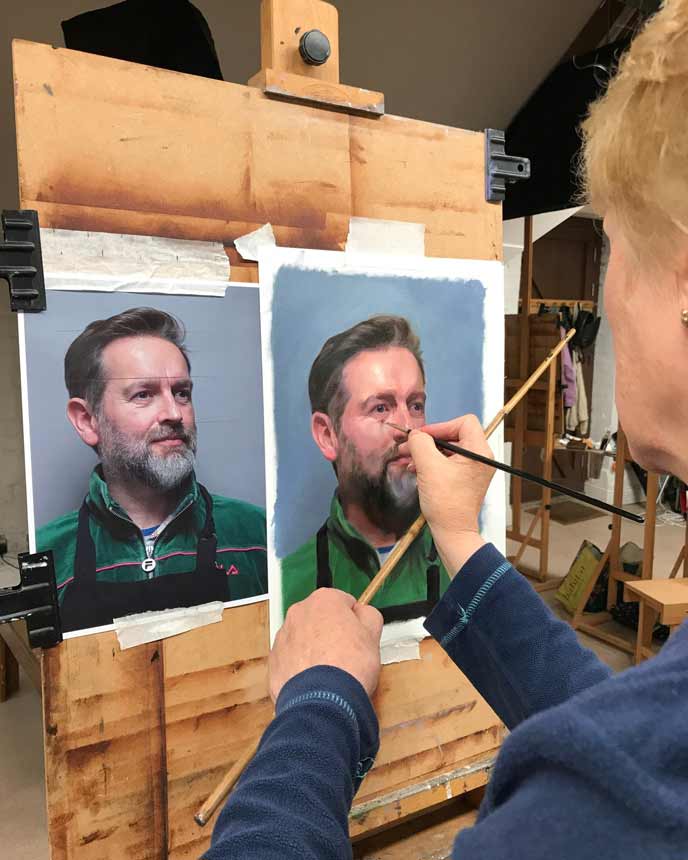
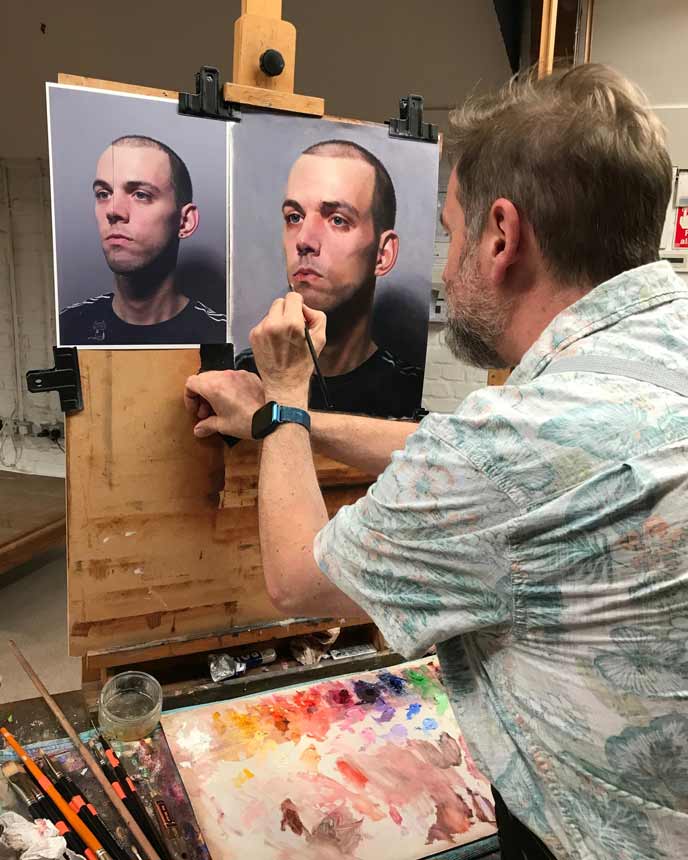
All images below are taken from Louis Smiths demonstrations in front of the class when delivering each lesson.
Tone
The secret to a successful painting is measuring tone and colour in that order.
First we start with the Sight Size technique which is copying the reference like for like. Once we are comfortable with this measuring technique we then progress to comparative measurements based on proportional units of measurement, this method is used when observing the model from a distance.
Timetable
Timetable Portrait Painting Course
19th September 2026 – 17th July 2027
Saturdays, 9.30-4.30
Total of 37 Weeks Tuition
1st Term 19th Sep – 24th Oct | Half Term | 7th Nov – 19th Dec 2026
Christmas Break
2nd Term 9th Jan – 6th Feb | Half Term | 20th Feb – 27th March 2027
Easter Break
3rd Term 17th April – 29th May | Half Term | 12th June – 17th July 2027
Payment
Cost, £975 per term (3 terms per course)
Deposit , £200 and the remaining balance of £775 is to be paid 3 weeks before the start of the Academic Year. Details will be sent in the confirmation email.
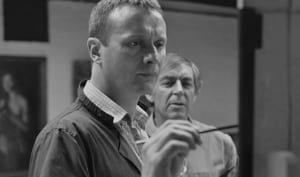
Instructor
Meet Your Instructor: Louis Smith
A classically trained portrait artist with years of experience studying in Florence, Louis has helped countless artists break through their creative struggles. With live demonstrations and hands-on guidance, you’ll gain the skills that took master painters years to discover—delivered in an easy-to-follow, structured program.
See his work at: louissmithart.com
Tone Topics Covered
Drawing

Lesson
Lesson = Students learn how to measure using the Sight Size method, learning how to map the features of the face.
Exercise = Students work from Charles Bargue master copies, then apply this method to the drawing of each feature.
Model = Charles Bargue master copies and photo references of the features.
Homework = Articulate the features of the face.
Outcome
Students will learn:
- How to measure.
- How to describe the features of the face.
Assaro Head

Lesson
Lesson = We will be using the Asaro head as an armature to simplify the features into geometric planes.
Exercise = Learning how to observe and describe form using a step by step process.
Model = Asaro Eye, nose and mouth reference.
Homework = Repeat the steps in class.
Outcome
Students will learn:
- Understanding tonal relationships.
- How to render form.
Features

Lesson
Lesson = Assimilate the Asaro head. Adapting what we have learned from the previous lesson to break down the features into smaller and smaller planes
Lesson = Assimilate the Asaro head. Adapting what we have learned from the previous lesson to break down the features into smaller and smaller planes
Exercise = Breaking down the form of the eye, nose, mouth and ear into simple planes.
Model = Eye, nose, mouth and ear references.
Homework = Repeat the steps in class.
Outcome
Students will learn:
- Simplifying complexed form.
- Observe and describe abstract shapes.
Anatomy of Light

Lesson
Lesson = Understanding the anatomy of light, breaking down the form into its separate tones of highlight, halftone, shadow and cast shadow.
Exercise = Follow the steps listed to illustrate the form of a sphere.
Model = Polystyrene, ball, square and cylinder.
Homework = Repeat the steps in class to illustrate the form of a cylinder.
Outcome
Students will learn:
- Understand the anatomy of light.
- How to blend and soften edges.
Triangle

Lesson
Lesson = Put all the main features together to form the triangle of the face. An accurate portrayal of the eyes nose and mouth is important to produce a recognisable face.
Exercise = Working big to small, starting with overall form of head then the features.
Model = Photo reference.
Homework = Practice this technique by painting the head from a different angle.
Outcome
Students will learn:
- Big form modelling.
- Edge manipulation.
- Structure of the face.
Full Head

Lesson
Lesson = Rendering the head. This is the last of the grisaille exercises consolidating all the principles taught so far.
Lesson = Rendering the head. This is the last of the grisaille exercises consolidating all the principles taught so far.
Exercise = Follow the 23 step guide.
Model = Photo reference.
Homework = Repeat all the steps with a different reference photo.
Outcome
Students will learn:
- How to complete a rendered grisaille portrait.
- Model hair.
Colour Topics Covered
Colour Wheel

Lesson
Lesson = Understanding Colour. Hue, chroma and value explained. Deeper knowledge of complimentary colour and colour temperature.
Exercise = Colour wheel, mixing secondary and tertiary colours from primary colours. Mixing flesh tones, high chroma – low chroma, warm and cool.
Model = No Model.
Homework = Practice colour mixing exercises.
Outcome
Students will learn:
- how to manipulate colour
- how to mix flesh tones
Master Copy

Lesson
Lesson = Richard Shmid is a modern day master of Alla Prima portraits, the aim of this study is to emulate his loose high chroma style.
Exercise = Study a Richard Schmid portrait painting observing the use of colour, strokes and accuracy.
Model = Apply what we have learned with the Model.
Homework = Study Richard Shmid Portrait. Paint a portrait in similar style either sitter or photo reference.
Outcome
Students will learn:
- colour mixing.
- deftness of handling.
- Bravura.
Assimilation

Lesson
Lesson = This Lesson is designed to push the boundaries of colour by assimulating Richard Shmid’s approach to capturing the variety of colour in the face.
Exercise = Study observing the local colours of the face and exaggerated colour mixing.
Model = Referance of Paul.
Homework = Repaint the study to see how much you remember.
Outcome
Students will learn:
- to push colour and it still look believable.
- bravado.
Direct Painting

Lesson
Lesson = John Singer Sargent master copy. Now we are starting to refine the colours of the face by copying Sargents lowere chroma colours.
Exercise = Break down the portrait in to simple planes of hue, chroma and value used by Sargent
Model = Lady Agnew portrait.
Homework = Repeat the exercise with another master copy.
Outcome
Students will learn:
- to push colour and it still look believable.
- bravado.
Features

Lesson
Lesson = This lesson is designed to observe and describe the subtlety of colour and tonal relationships by assimulating Sargents approach.
Exercise = Lower the chroma and maintin the planes to describe the form of the face.
Model = Referance of a young girl..
Homework = Repeat the exercise.
Outcome
Students will learn:
- how to mix lower chroma colours.
- Subtlety.
Refining

Lesson
Lesson = Softening edges, still observing the planes of the face but refining the variety of edges as when rendering each plane.
Exercise = Observing the variety of edges of each plane ranging from sharp to soft.
Model = Using a portrait model and reference.
Homework = Work on the portrait in their own time.
Outcome
Students will learn:
- refinement of edges.
- how to finesse the lessons learned so far.
Additional information
| Tuesday or Saturday | Tuesday, Saturday |
|---|