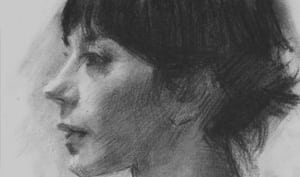
Step 12: Painting the Neck – Portrait of Lisa
Painting the neck. The neck supports the head and contributes to the overall sense of structure, posture, and light flow in the portrait. This step focuses on refining the form of the neck, simplifying its planes, and adjusting tones to support the face without drawing too much attention.
- Simplify the Neck into Major Planes
Just like the face, the neck can be broken down into front, side, and bottom planes:
• Front Plane – Usually the brightest, catching the most direct light from above.
• Side Planes – Slope gently away, often into cooler or darker shadow, depending on the light angle.
• Bottom Plane – Includes the base of the neck and under the jaw—typically the darkest and may contain reflected light from the clothing or environment. - Understand the Anatomical Landmarks
• Sternocleidomastoid (SCM) – A key muscle that runs from behind the ear to the centre of the collarbone. It defines the side planes of the neck and creates natural shadow shapes.
• Trapezius – Slopes from the neck down toward the shoulders, forming a soft, slanted plane.
• Throat and Windpipe Area – The centre front of the neck, often smoother and more open to light.
- Hollow at the Base (Suprasternal Notch) – Can contain a soft shadow depending on the light, useful for creating a sense of depth and grounding the portrait.
- Tone, Temperature, and Transitions
• The neck generally receives less reflected light than the face, so keep tones slightly cooler and less saturated.
• Avoid making the neck too bright or detailed—it should support the head without competing with it.
• Use soft transitions from shadow to light, especially around the SCM and under the jaw.
• Reflective light under the chin or along the jawline can help separate the head from the neck subtly. - Edge Control and Integration
• The edge of the neck where it meets the jaw or hairline should be soft and natural—avoid harsh outlines.
• Transition the skin tone smoothly from face to neck,